Showing posts with label Craft. Show all posts

Monday, May 6, 2013

{Minilands}

I love miniatures. I really do but its kind of complicated when I try to make them myself. Ever since 2011 I think, I started making "wonderlands" in small crystal containers with the main object being mushrooms and woodland related things. There has always been something appealing for me about wood and moss, especially moss, that is just beautiful. Since I don't exactly live in a "mossy" area, I try to add little pieces of it to any space by making this uh... things or globes if you want to call them that.


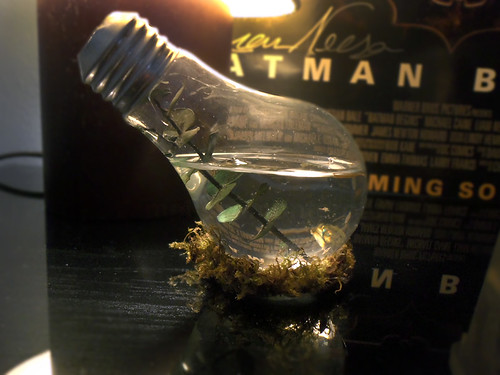
I found the globes one time I was out with my dad and he suggested I should get them to do "something similar to the small mushroom things you do". After thinking about it I decided to get them. Guess they came in handy in my times of boredom.


As for this one, since my sister kept buying baby food for my new niece, I kept all the containers... and they were A LOT. Not that I'm complaining. I made a lamp out of this one but I had to redo it cause I was planning to sell it but didn't.


Missing You by Green Day

Sunday, May 5, 2013

{Forks}

You might have seen this somewhere else. I surely did.
A couple of years ago, I saw this really cool bracelet made out of a bended fork and I told myself I will do that someday. Guess that day arrived... 7 months ago. Yeah, yeah, I'm posting stuff I made 7 months ago but at least it's something. The hard part came when I had to find a fork that could bend enough for me to make a bracelet out of it. Luckily, I found it on my first search.


My brother had this really cool powder paint which stick on any metallic surface it touches and then, by taking the piece into the over, it will adhere to the piece leaving no runny/ brush marks/ etc behind. Pretty neat!

Materials:

  • Cheap fork
  • Pliers
  • Paint
♫ Submarine by Ocean Lips

Saturday, April 27, 2013

{Film Keychain}

One year ago, I had to take my first photography class. Since I had to use an analog camera I had to buy film. A lot of film. Don't get me wrong, I prefer how the photos turn out in analog photography over digital but spending 2-3 hours waiting for my film to develop in a quite far place is no cup of tea.

The first time I went to develop I asked the guy if it was ok for me to get  some of the empty canisters he had around. I was aiming for 2 or 3 but he ended up giving me 10 {pretty neat}. You can do a lot of things with empty canister but I settle for keychains.


Extremely easy to make and very eye catching if you ask me. Some people have gotten some of them. Oh so nice to know people like stuff you make.

Riot Radio by The Dead 60s

Friday, February 15, 2013

{Studs}

Last wednesday and thursday I was part of the bazar my University does every year. I'm not going to lie and say it was all fun and games cause it was not. At all. I ended up with a sore back, neck pain and so much anxiety I could fill up a stadium but it was my first time, I will learn.

As part of my merchandise, which consisted of bottle cap earrings, detachable collars, old film keychains, fork bracelets, my wonderlands and cupcakes from my kitchen mad science friend Pablo "Mazola", I made some little studs.


Cutting little pieces of cardboard and doodling on them was part of all my products. I will probably make a DIY of this so stay tuned.

NOTE: Anyone interested in buying any of them, living in DR, just let me know.

Black Treacle by Arctic Monkeys

Tuesday, September 18, 2012

{A present for Geo}

Hello there!
Going back to what has become the best summer of my life, Natali, Patricia and I wanted to give George, our department supervisor, a little something. As many of you might know, I prefer handmade gifts over generic buy-from-a-store ones. The original plan was to make a portrait of Britney Spears out of bottle caps {people who worked at the bar always save the beer caps for us}. I didn't worked out. In the end I draw a black and white portrait of Britney Spears.

Me and the girls went to Goodwill to find a decent frame to put the drawing when all of the sudden, we found a badass frame: It had a big cork board and three photo frames. What we decided was that we were going to take photos of ourselves holding George's name. Me being me, I painted my face and the girls' faces.


He loved it! Success. The day of the last employees party the park throw, he put it outside for everyone to see. I felt ~special~ {not really but you get the idea.


Materials:

  • Acrylic paint.
  • Pencils.
  • Cardboard.
  • Markers.
  • Big photo frame.

Tuesday, July 10, 2012

{Doodling on Converse}

My poor 6 years Converse.


I've been wearing the same pair of Converse since I was 14 years old. They've been through mud, rain and 100 other things I cannot remember. Since I found a bottle of white fabric paint for US$ 0.99 in one of my Shicake goes thrifting trips, I decided to add some doodles to my old pair.


Took me like 10 minutes to finish both of them. Happy with the result.


Materials:
  • White fabric paint.
  • Old pair of black Converse
Crying Lightning by Arctic Monkeys

Friday, January 6, 2012

{Diana}

F+!
I guess this will be my first craft/drawing of the year. After some fabric searching, paint mixes and a really boring evening, I end up making a camera shaped mini pillow {with some help from my mom on the sewing department since I suck at sewing. P.S.: learn how to sew}


Materials:

  • Fabric
  • Sharpie® Black Marker
  • Acrylic Paint
  • Sewing Machine
♫ Is This It by The Strokes

Saturday, December 17, 2011

{Tooth Fairy}

Not exactly tooth fairy but let's get to the point.
I saw a photo of a necklace somewhere an it had tooth as pendants and I loved it. Problem was, as always, the photo had no reference so no necklace for me. I try to make my own tooth necklace and this what I got {not sure if painting them silver was a good idea though}:


As a bonus, I made a pair of earrings and I kind of prefer the earrings instead of the pendant but I'm keeping them both:


Materials:
  • Air dry clay
  • Wire
  • Earring loop
  • Silver spray paint

♫ Fire And The Thud by Artic Monkeys

Thursday, December 8, 2011

{Water bulb}

What do you do with your light bulbs?
Sure you could {a} use them if they are new, {b} throw them away once they stop working, or {c} you could make something with them!
I refuse to throw anything away unless I'm 100% sure I'm not doing something with it, I made a water bulb. What is exactly a water bulb? a hollowed out light bulb {incandescent ones, not fluorescent. NEVER fluorescent} full of water.


I've been into moss lately {since I finally bought some} and I add moss on everything! This time the base of the bulb was the moss victim. 


I need to find what I'll put on the water, maybe a plastic frog or something... I don't know. Till then mateys. 


Materials:
  • Light Bulb
  • Air Dry Clay {for the base}
  • Water
  • Glue Gun
  • Moss
♫ 80 by Green Day

Friday, November 11, 2011

{Shoe ringin'}

Oh titles, I hate you.
I needed a place to put my {not so large collections of} rings. While searching for D.I.Y.s, I saw a photo of a show with rings or something like that and I came up with this. Didn't turn out as I expected since the termination is not the best but hey, at least I have a place to put my rings now {the photo is not the best. Today is not my day...} :


Materials:
  • Old heel
  • Studs
  • Fabric leftovers 
  • Glue gun
  • Scissors

♫ You're the Reason I'm Leaving by Franz Ferdinand

Sunday, November 6, 2011

{Jewelry Display}

Yay!
Never throw away anything. At least that's what I do {which ends up being a pain for my room but whatever}. End up with my hands on an old picture frame but it was white and I didn't want it white so here is what happened, got some black paint, some hooks and leftover Jute fabric:


And now I have a simple yet handy jewelry display for my not so large jewelry collection.


Forgot to add, Leslie and I were making some Hama beads pendants and such and I end up making a keychain for my keys:


Materials:
  • Old Frame
  • Black Paint
  • Hooks
  • Jute Fabric
  • Wire
  • Hama Beads {Keychain}
Guitly by G. Khan / R.A. Whiting - H.Akst

Saturday, October 22, 2011

{Heineken Caps}

Bottle caps that is.
I always keep bottle caps {as well as cans, but that's another story} and never do a single thing with them. Yesterday I grabbed two of the best looking ones, made holes and add a earring thing.
New earrings for me!

Materials:

  • Bottle Caps.
  • Wire.
  • Earring loop.
♫ 12:51 by The Strokes

Friday, September 23, 2011

{Cigarettes. Cigarettes.}

...but I do not smoke.
Ever since I saw a photo of a painted cigarette eons ago I have this weird fascination with them as a painting/drawing media. The only problem being: I do not smoke therefor I couldn't get my hands on a package up until yesterday. I got them for free which is a plus since I was not going to buy a package just to paint on them and then just find somebody who will want them. I got a small package and started doodling in them.


I just need to find somebody who will be willing to light one of them to see how the colors burn! no, I will not let people smoke them, I just want to burn them. And to see what happens since I painted them with Sharpie®

Materials:
  • Cigarettes.
  • Sharpie® markers.
♫ Welcome to Paradise by Green Day

Saturday, September 10, 2011

{Chalk it up!}

I finally did this!
I've been wanting to do this for almost a month and the weather have been so unstable... I was going to paint them yesterday but while I was taking classes it started raining and continue raining all day long. Today was all sunny so I went outside and start painting my cans with chalkboard paint:


Really easy to do. Just grab some empty cans and paint them with chalkboard paint. My camera battery is not longer working...

Materials:
  • Old empty cans
  • Chalkboard paint
Scream by Chris Cornell

Saturday, September 3, 2011

{"C" is for Cookie}

that's good enough for me.
I had a hard time picking the right colors for this. I painted this God knows how many times before I got the color I liked. I'm not sure how I ended up making this. I think I was making a mold for something and while testing it I had this chunk of clay and nothing to do and this is what came out of it:


Materials:
  • Air Dry Clay
  • Acrylic Paint
  • Wire
  • Scissors, cutter, toothpick {for texture}
♫ GfC by Albert Hammond, Jr.

Sunday, August 21, 2011

{Twigs & USBs}

Last month I was downstairs with my dog and saw a lot of twigs scattered around. I picked a big amount of them and kept it somewhere in my workroom. While randomly searching some DIY sites, I ended up in SEMI. They have this really awesome DIY of how to make a key hook out of a branch. I ended up trying it myself:
While I left the twig with the paint to dry, I decided to paint my nails with the spare paint I had.
You can find the tutorial here. I did a smaller version of it and I added some push pins to put it on my cork-board and use it as a USB holder:

Materials:
  • Twig/Branch
  • Acrylic Paint
  • Hooks
  • Push Pins
  • Glue
From The Ritz To The Rubble by Arctic Monkeys

Saturday, August 20, 2011

{Nanananana nananana}

Onomatopoeia!
Oh comic books... I like how they put the sounds in them so I made pendants! I made some quick sketches before I started making them:

Got to say, I had little patience this time with the clay. I wanted it to dry. Fast. This morning I finally found them dry. To make them you just have to follow this little steps:

Thursday, August 4, 2011

{Band Bookmarks}


Yay!
I got wooden sticks yesterday because I've always wanted to work with them. The easiest thing to do with them are bookmarks so I give it a try.
Made a Green Day, Blink 182 and Paramore one. Guess I'll have to make one of The Strokes, Arctic Monkeys and Linkin Park.
Materials:
  • Air dry clay.
  • Wooden Stick {Popsicle ones}.
  • Acrylic Paint.

Monday, July 25, 2011

{PataPON + Tutorial}

Fever!
Patapon, I really like that game. After not knowing what to do in the past few days, I end up making a patapon pendant. I made a small tutorial {the first one I've ever made} of how to make one of this pendants:

Friday, June 24, 2011

{Hello Ze Strokes!}

Oh you know...
More The Strokes stuff. I needed a case for my computer and I came across this plain black and red one. Boring plain stuff I can't live with so I made a little something:
I was planing on painting the white part too when I realize I didn't have any white fabric paint. I end up using a piece of orange Foamy {since I didn't have white} and painted it white.


Materials:
  • Plain Computer Case.
  • Foamy.
  • Acrylic paint.
  • Fabric Paint.
  • Glue Gun.